

Let’s Create a Secret Garden! Part 1
A couple of years ago, I revamped the landscape in the front yard. It was a Summer full of pulling up sod, carrying brick, flagstone, rock, sand, and soil. What started out as a simple enlargement of one flower bed, morphed into a full-on Front Yard Refab! It all began when we decided to enlarge the area around the Hosta plants that are planted by the sidewalk in front of our house. Then, when that project was done, well, actually, while I was working on that section….I decided that it was a good idea to address the slope by the front tree….and so it went.
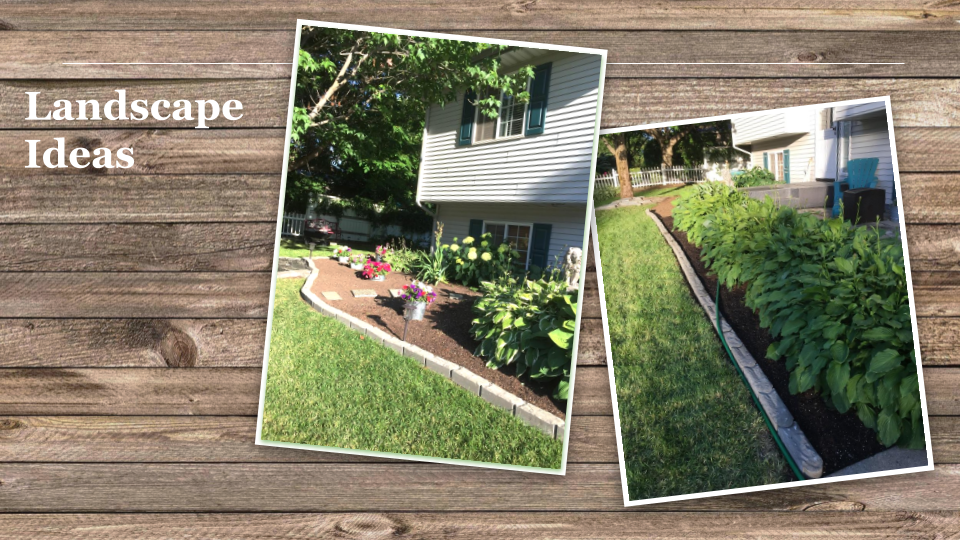
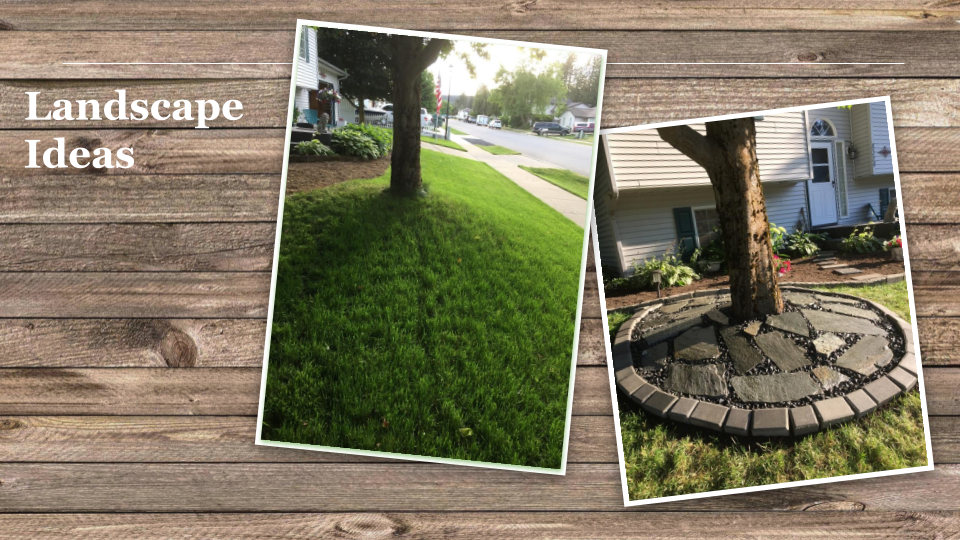
Previous Front Yard Projects
You can read about the front yard projects I did a couple of years ago by clicking on the pictures.
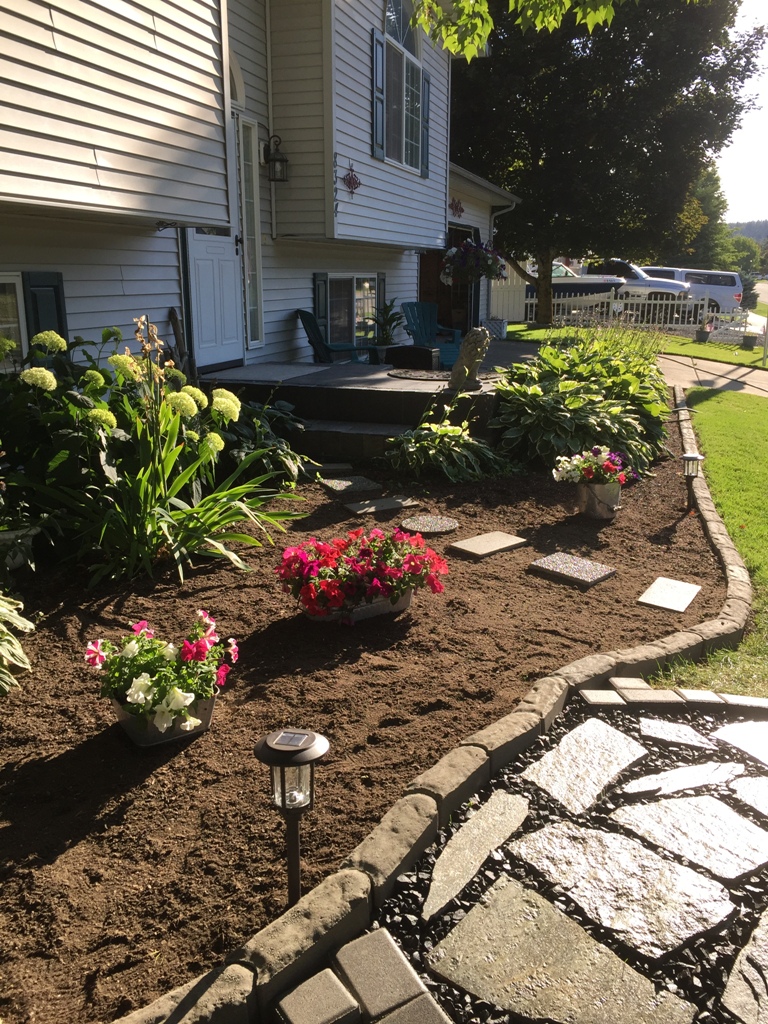
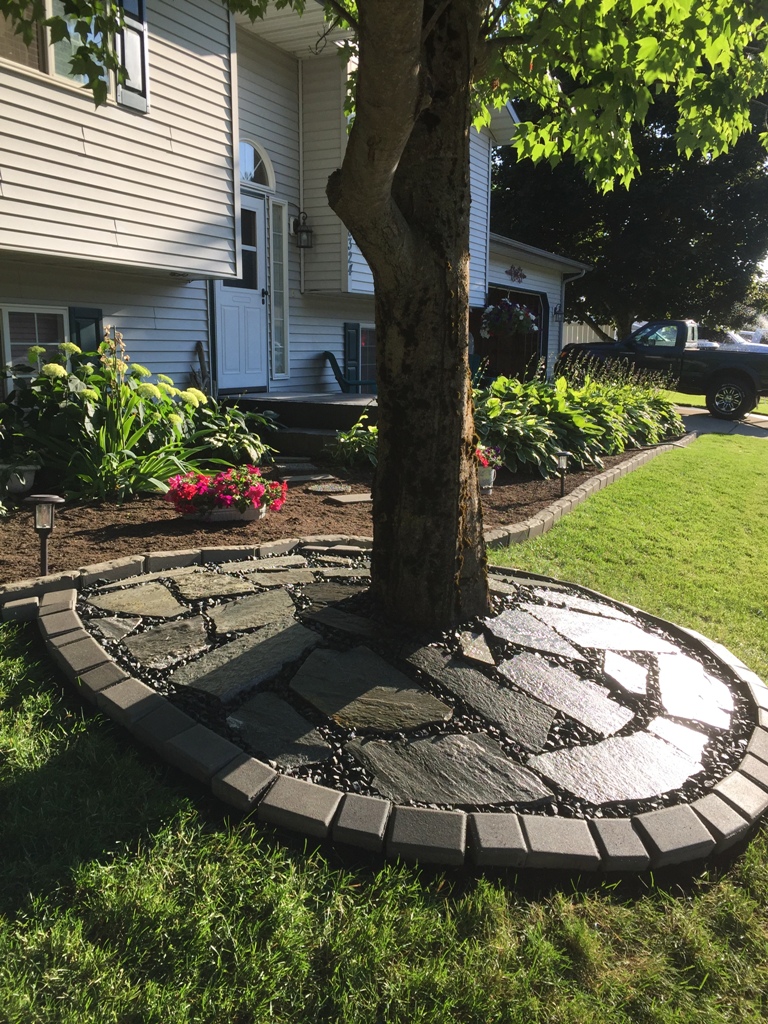
For your convenience, I have created a free printable for each project complete with Pics, Supply List & Instructions for you! Click on the pics below to access the information.
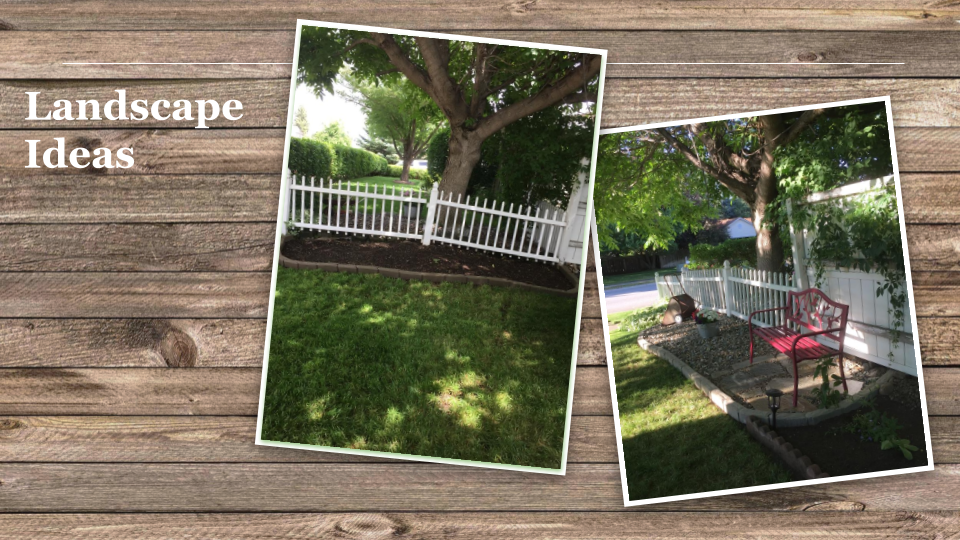
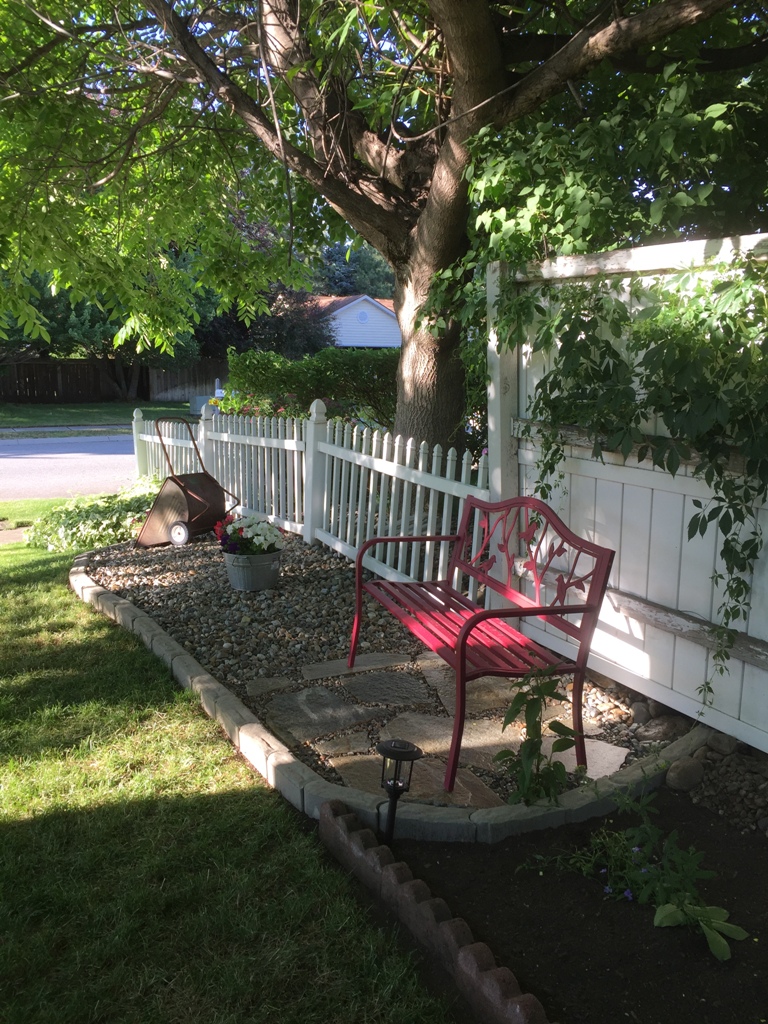
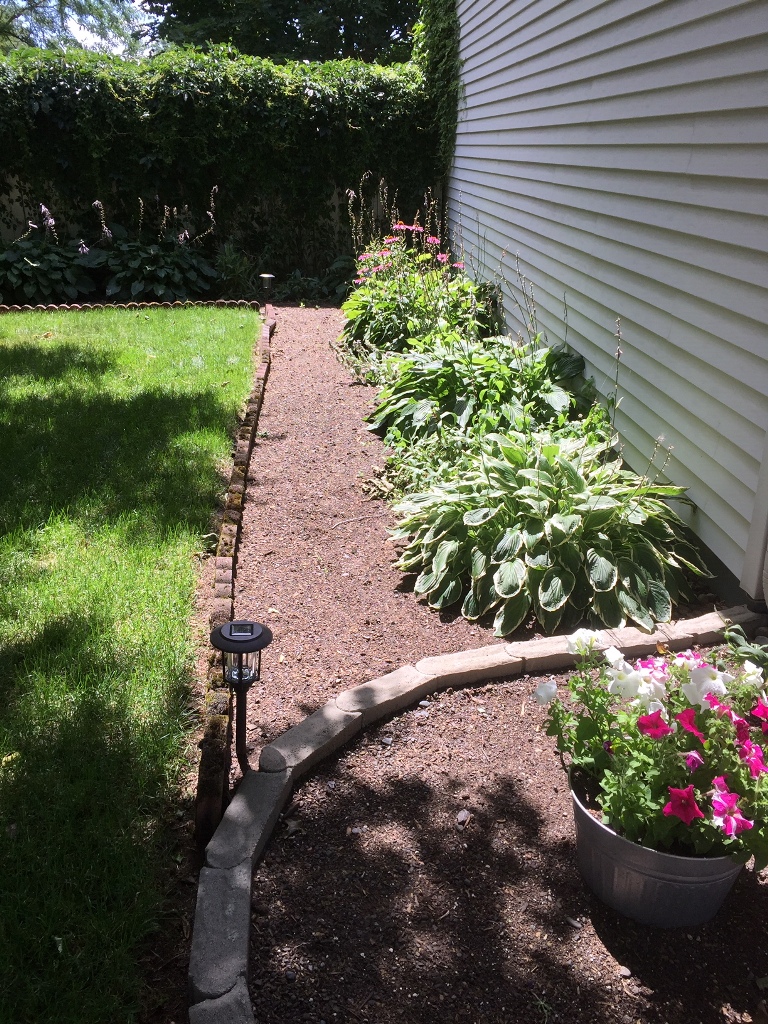
East Side Yard project
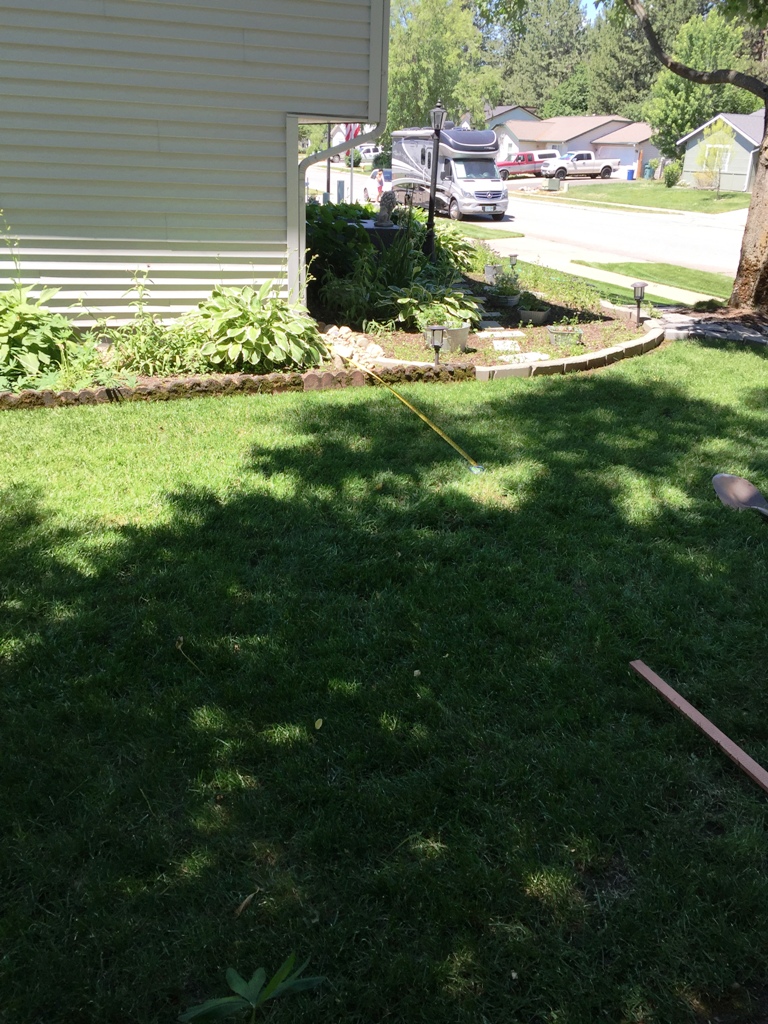
Now onto THIS year’s landscape project! When I was working on the front yard landscape a couple of years ago, I knew that evidentially I would be updating the Eastside yard. The grass in this section doesn’t get much sun due to the neighbors large walnut tree. Since it doesn’t get a lot of sunlight, the sod is patchy and doesn’t grow well. I wasn’t sure just what I would do with the area but started getting some ideas from Pinterest. When this Summer rolled around, I decided it was time to tackle this section of the front yard. I have decided to create a Secret Garden!
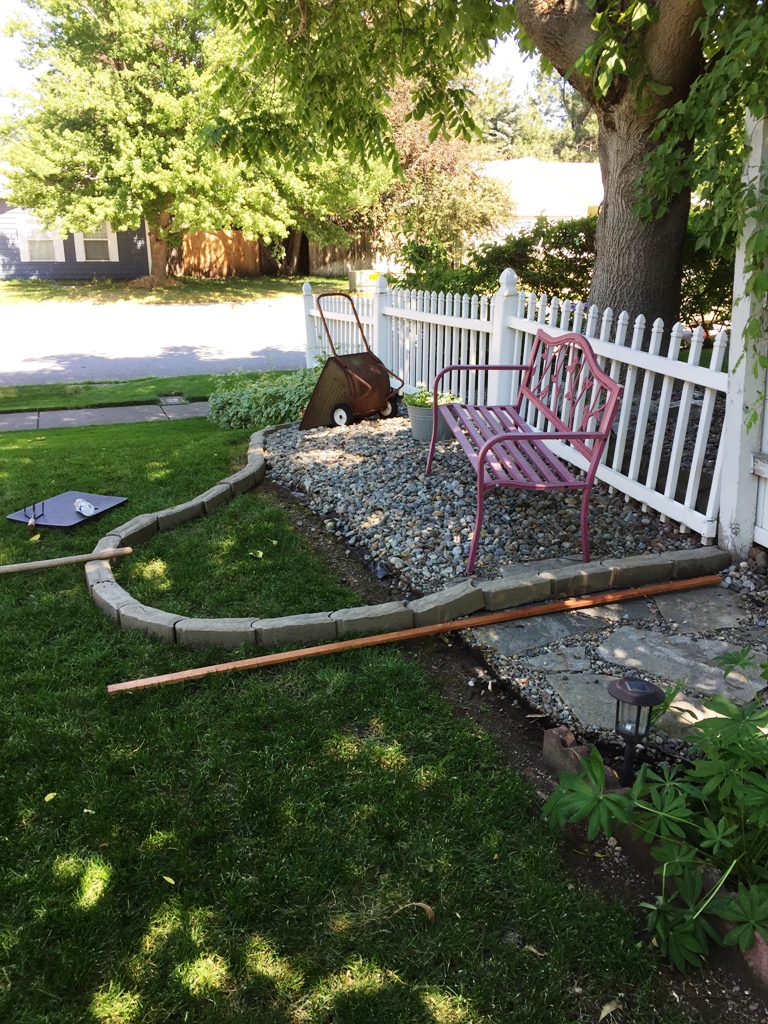
Relocating the bench

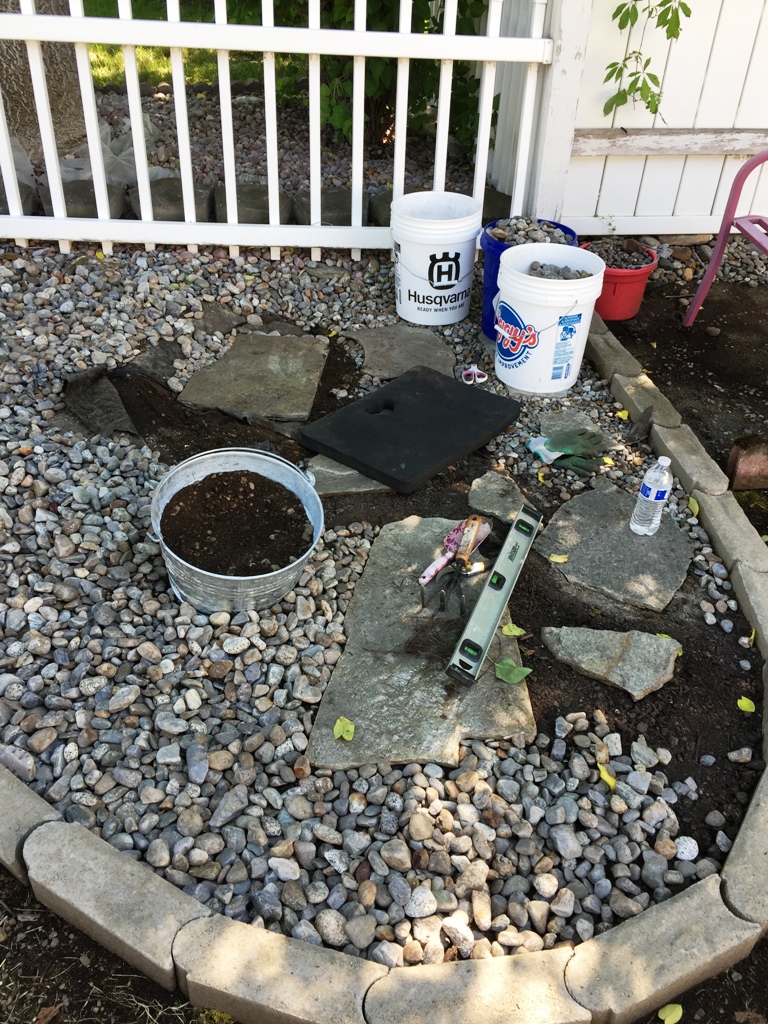
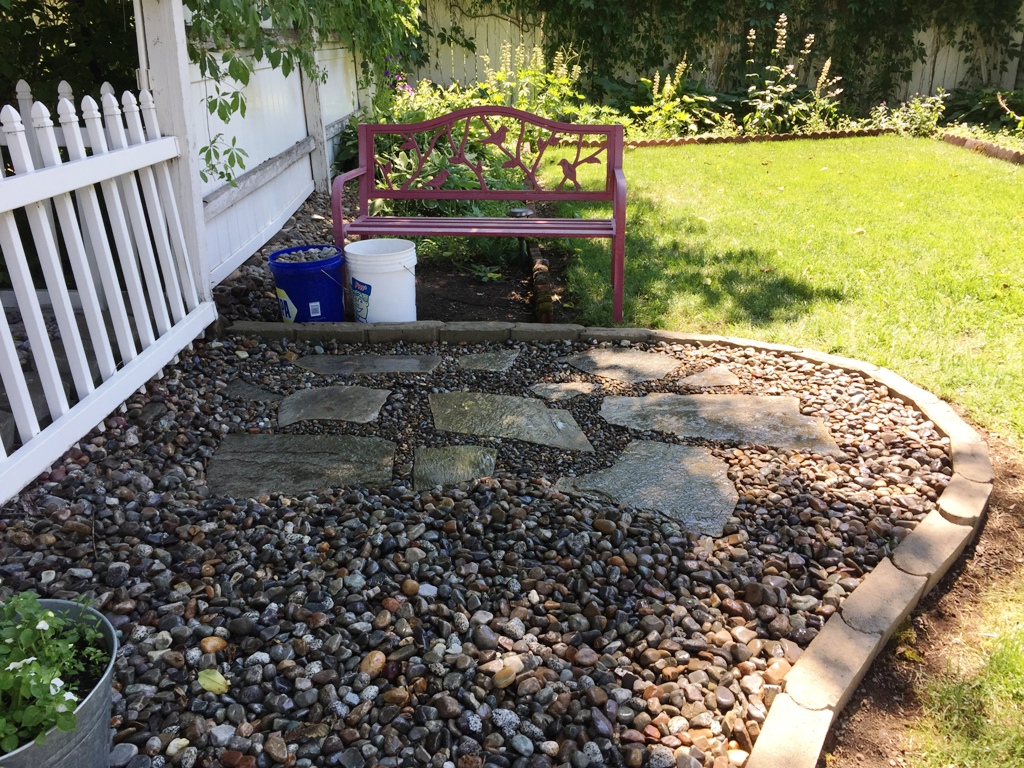
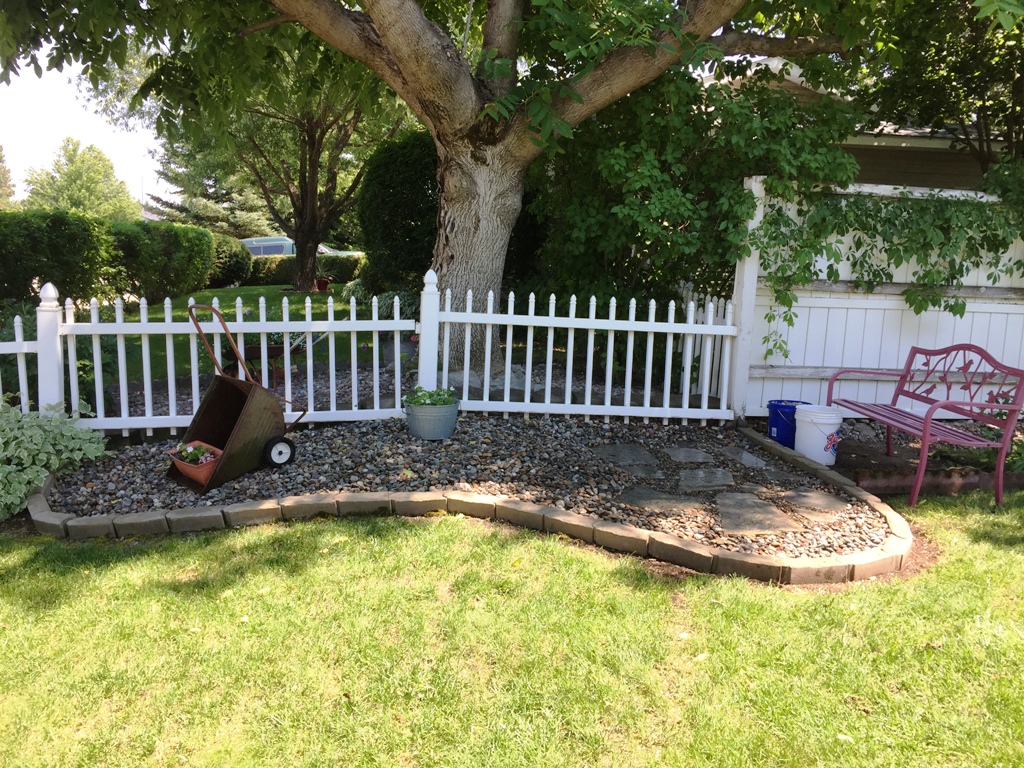
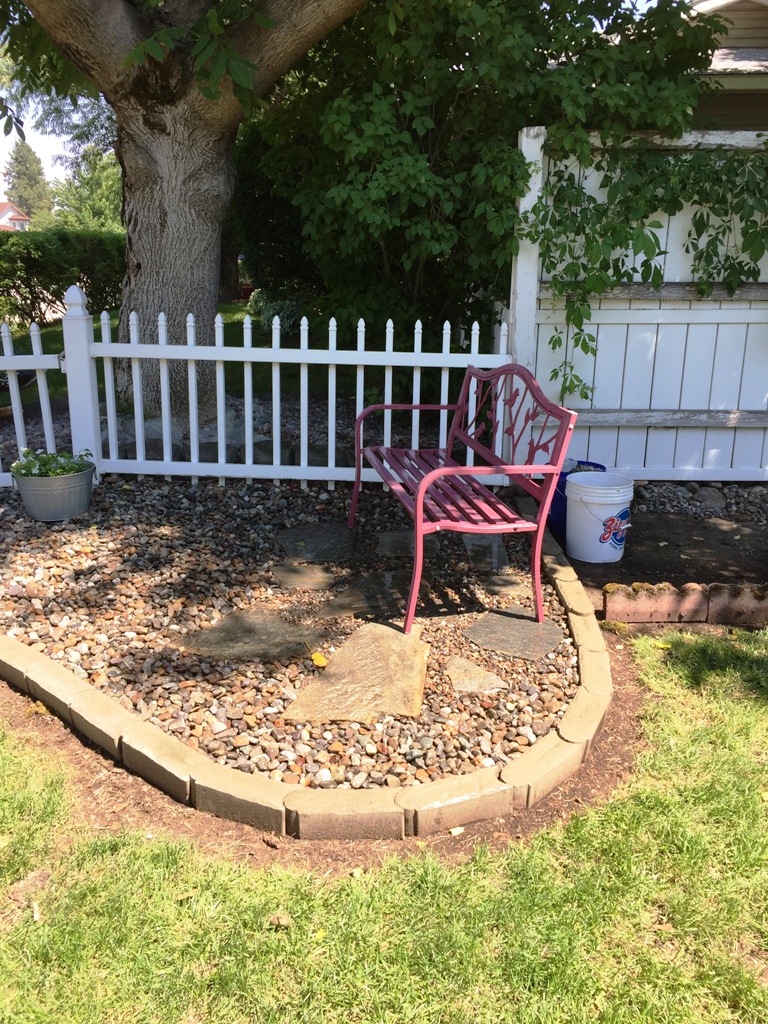
The first decision I made was to build a picket fence that would run from the fence that sits behind this bench to the house. Since the bench sits right in front of where to picket fence will go, my first job was to relocate it and the flagstone it sits on.
Before relocating the bench, I had to mark where the picket fence would go. I used my tape measure and an 8′ board to get a visual of the location for the fence. Then, I moved the existing edging bricks in a pattern that would outline the new space for where the bench to be. When I was satisfied with the size and location of the edging bricks, I removed the sod. The walnut tree has a large root that is close to the surface so making the entire area level is not possible, but I added some soil to the bench area to make it level. I then arranged the flagstone and moved the small rock that had been between them to the new spot. Yes, that was tedious!
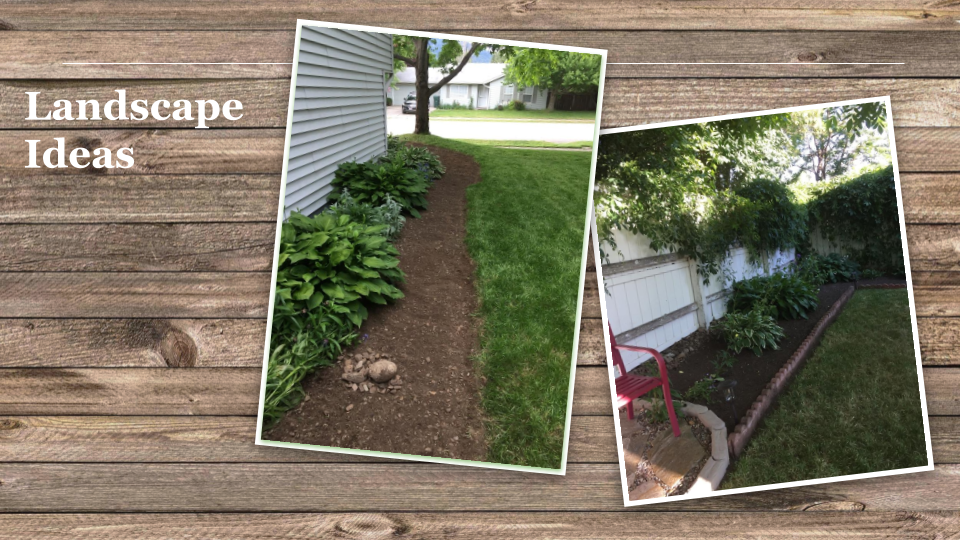
Removing the sod
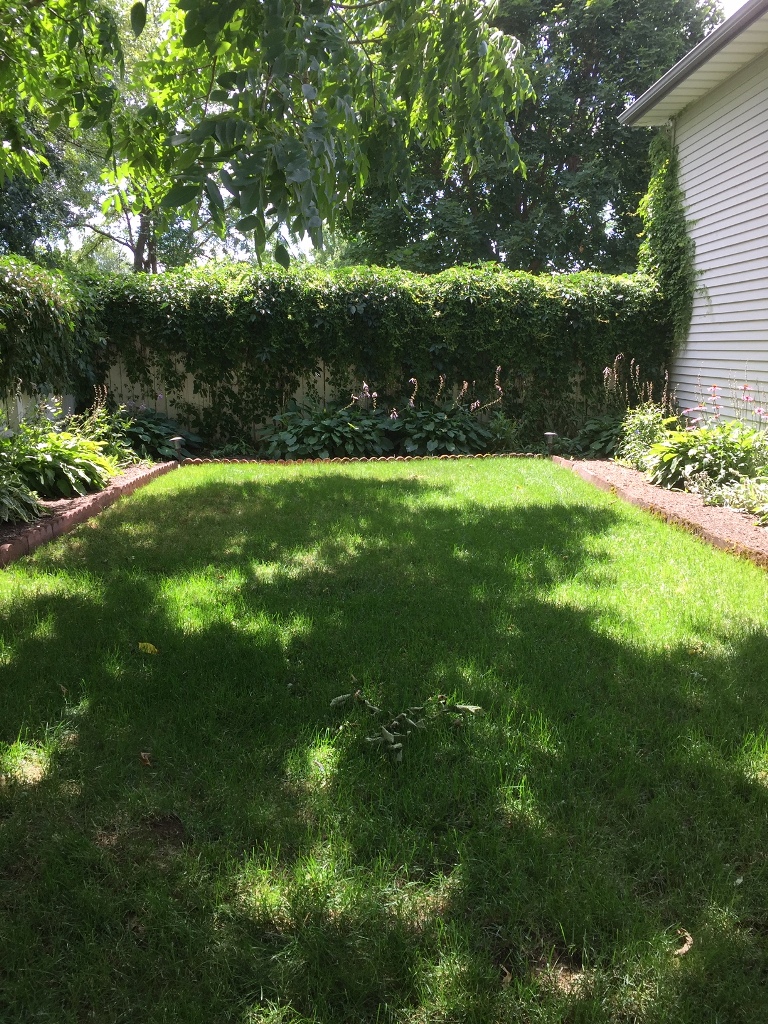
Now that the bench was relocated, it was time to remove the sod. The size of the East side yard between the existing garden is 14′ x 20′. There are sod cutters you can rent but I’ve always just pulled the sod up by hand. Sometimes the sod comes up pretty easy and other times, it’s a bit of a struggle. I’ve found that if the grass and dirt are a bit moist, the job is easier. If there are trees close by and you run into small roots that are intertwined with the soil, it is more difficult. I keep a small garden cutting tool with me to cut those viney roots away from the soil as I’m pulling up the sod. Since part of the sod was close to the walnut tree, I knew I’d need my small cutting tool.
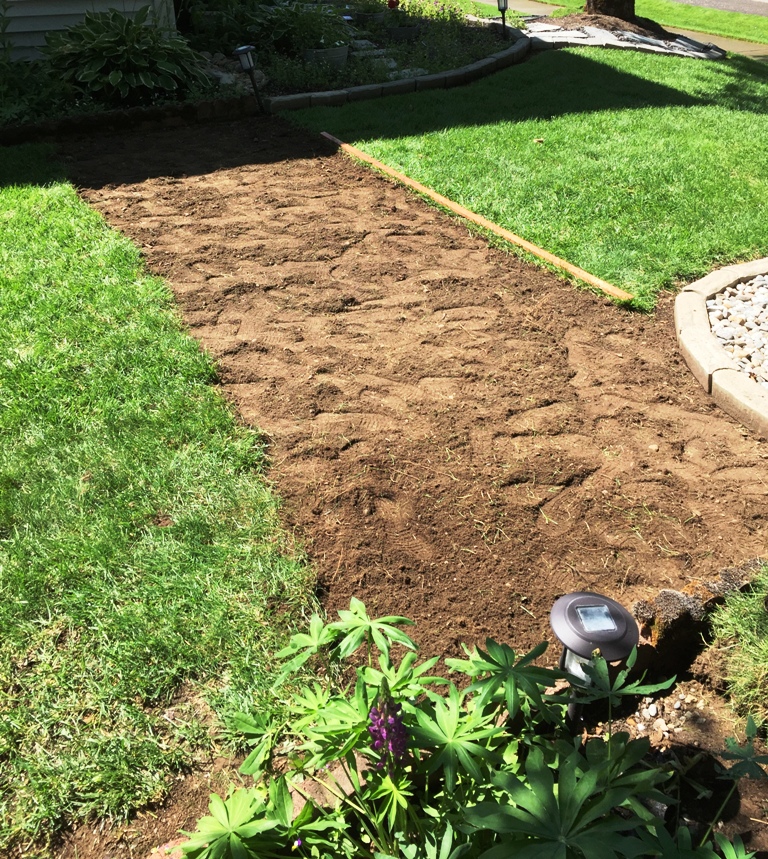
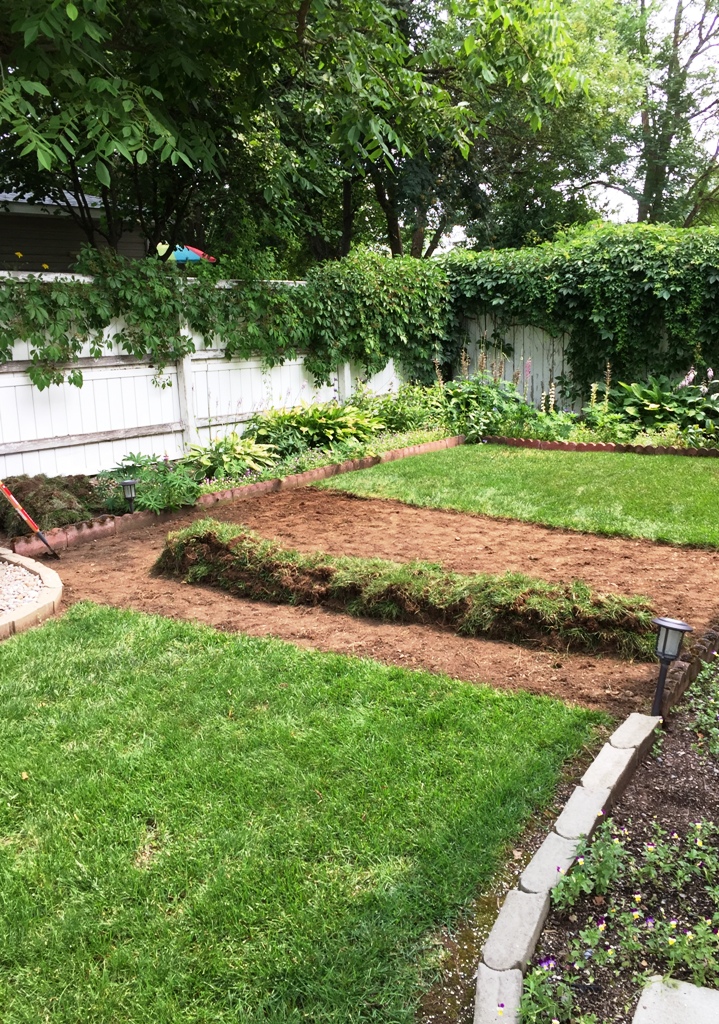
To begin the process of removing the sod, I grabbed my new tool and started cutting through the sod to the soil, making that cut about 2″ deep. In the past, I’ve used a garden shovel but this flat blade worked so much easier! Hubby says it’s a scraper to remove ice from the driveway….but I know it’s a sod cutter 😉
I cut the sod into sections that were approximately 1′ x 2′, doing so creates pieces that are both easy to remove and to use in a new location. To remove the sod, I used a garden knee pad, got down on my knees, and used a small garden rake to pry the sod from the ground. I stacked the sod close by so I didn’t have to carry it very far.
Fence Posts
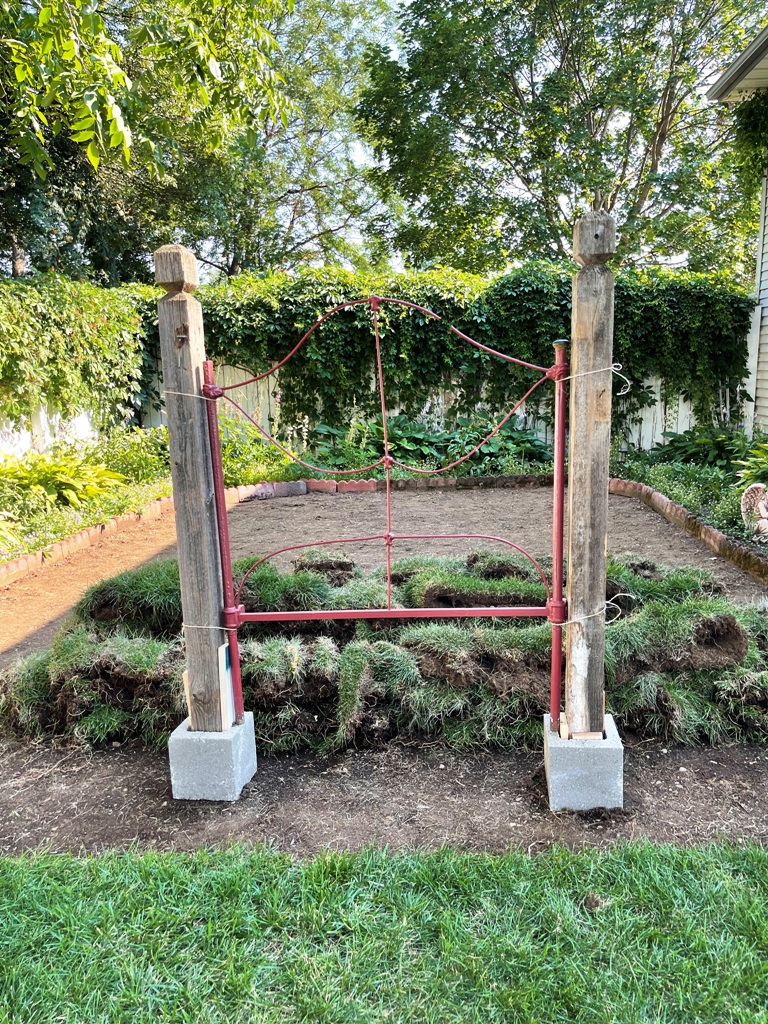
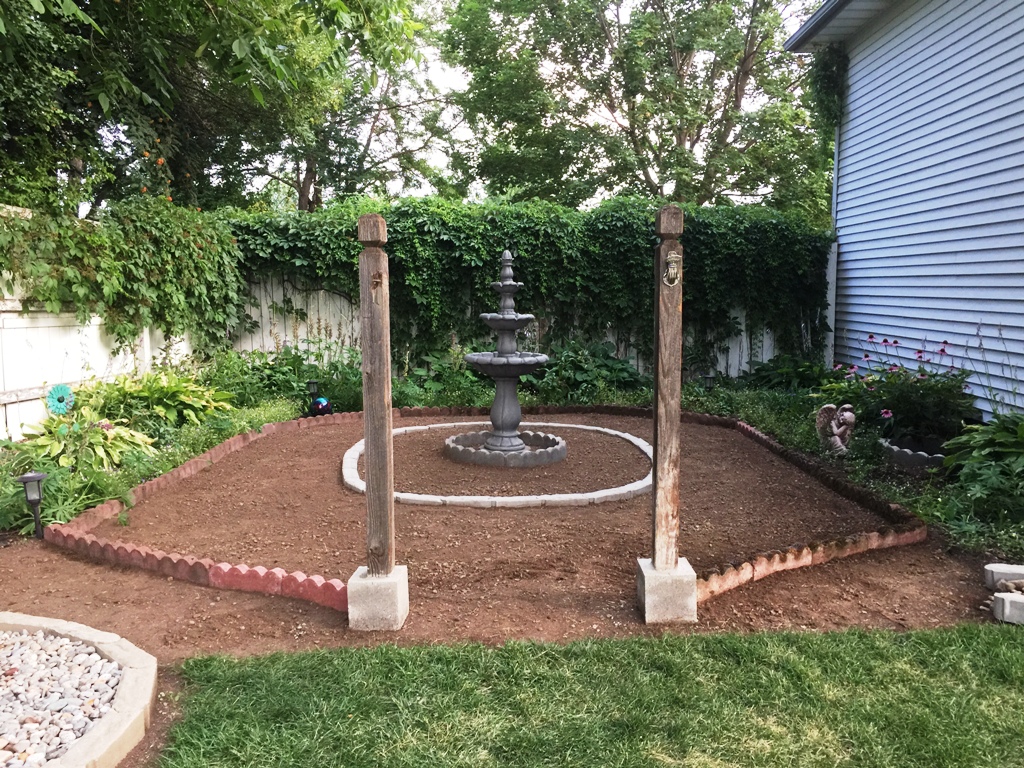
As I mentioned earlier, I plan to build a picket fence. We had to replace our deck boards last year and I kept all the old wood. I plan to use some of that wood for the fence. Although I have lots of 2″ x 6″ boards, I did need to buy 4″ x 4″ posts. I wasn’t thrilled to have to buy new wood, especially with the price of lumber right now. Besides, the wood I from the deck was nice and weathered. I had considered painting it white but then decided I’d leave it weathered. So, you can imagine my delight to find these posts at one of my favorite 2nd hand stores! They are from a barn and are nicely weathered! My thought was to cut the posts to be taller than the normal picket fence posts so when these were nice and tall, I knew they would work perfectly for my little fence!
Since I’m a visual learner, to get an idea of the space I had available to create, I set the posts where the gate would eventually be. I plan to use this antique headboard from a twin bed my daughter used to sleep in. Using small pieces of wood, I propped the posts in cement blocks and tied the headboard between them. Now I could see what the area looked like.
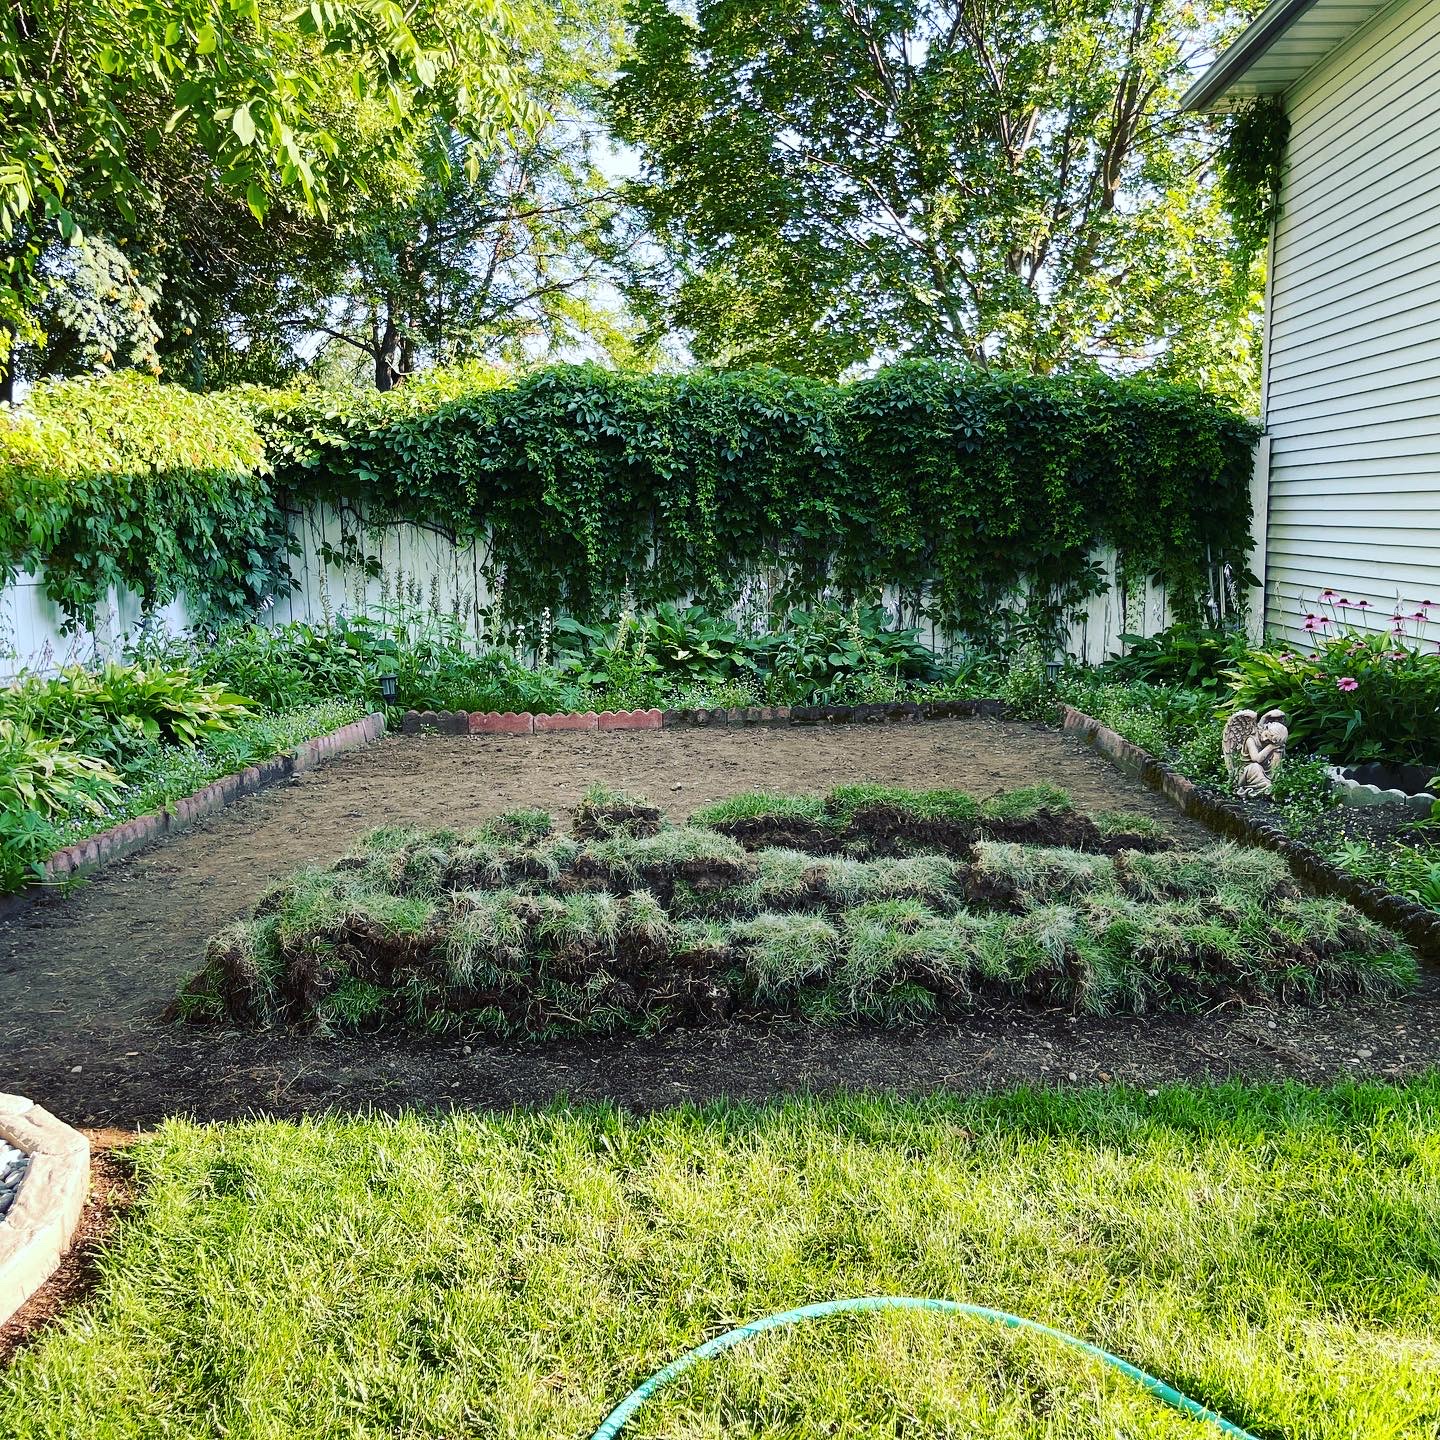
Blank Slate
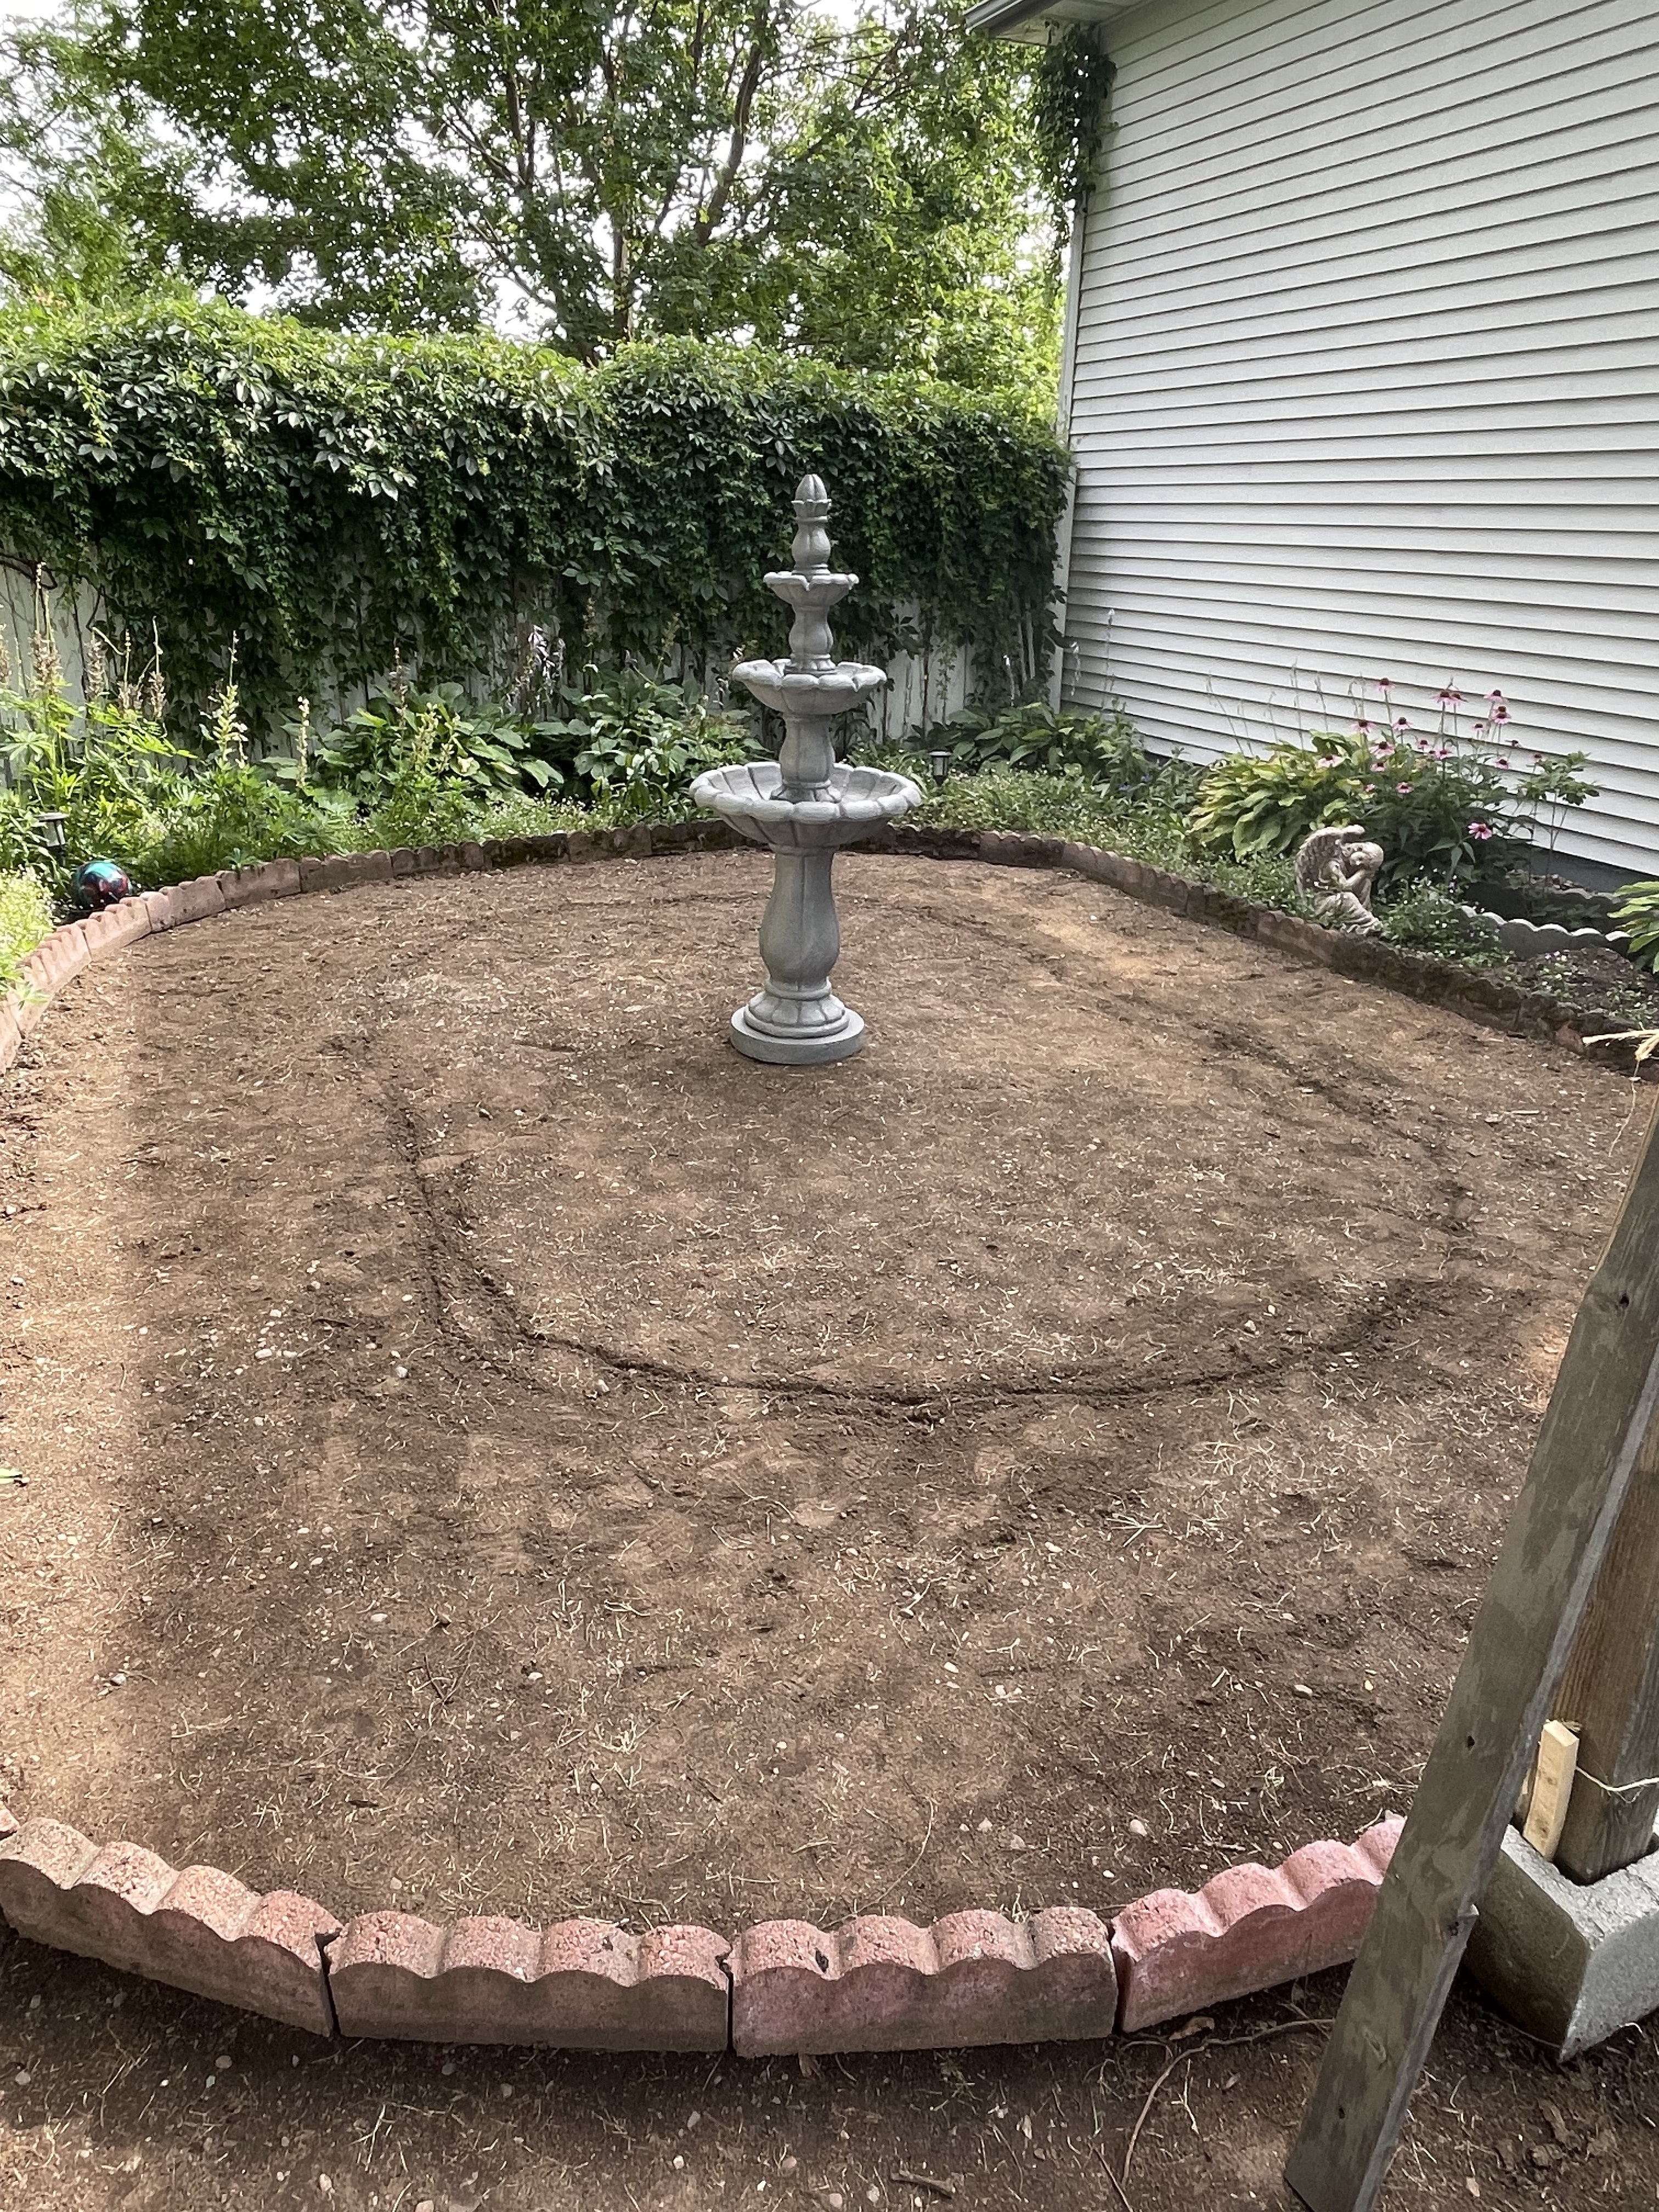
With the sod removed and the future gate in position, I could ponder how to convert the blank slate that I was looking at into the Secret Garden in my mind. I have always loved tiered fountains and thought that having one as a focal point would be nice for this space. I started looking around to see what was available. I really wanted a concrete one but couldn’t find any that were the size I wanted for the price I was willing to pay. I did see a couple at a local nursery but they were over $1,000! So, I started searching online. I found a few that I really liked but the tallest was around 45″ and I thought this space needed a taller one. One day I was in our At Home store and saw a fountain that I had seen a month ago before I started this project. At that time, I wasn’t looking for a fountain; but now that I was looking, I was thrilled it was still available! And, it was 60″ tall!!!! I bought it and brought it home. I set the fountain in the center of the space and scratched an ovalish area around it in the dirt to give me an idea of where I could create a new garden. Although it isn’t cement, it does have a nice weight to it.

Blank slate New fountain
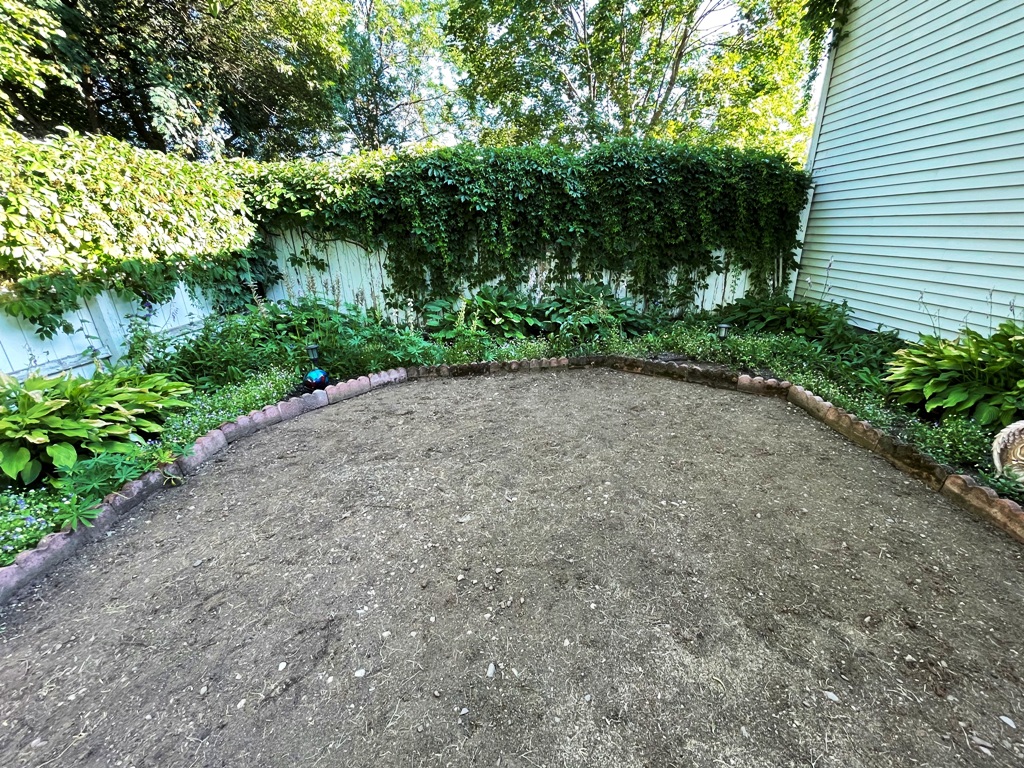
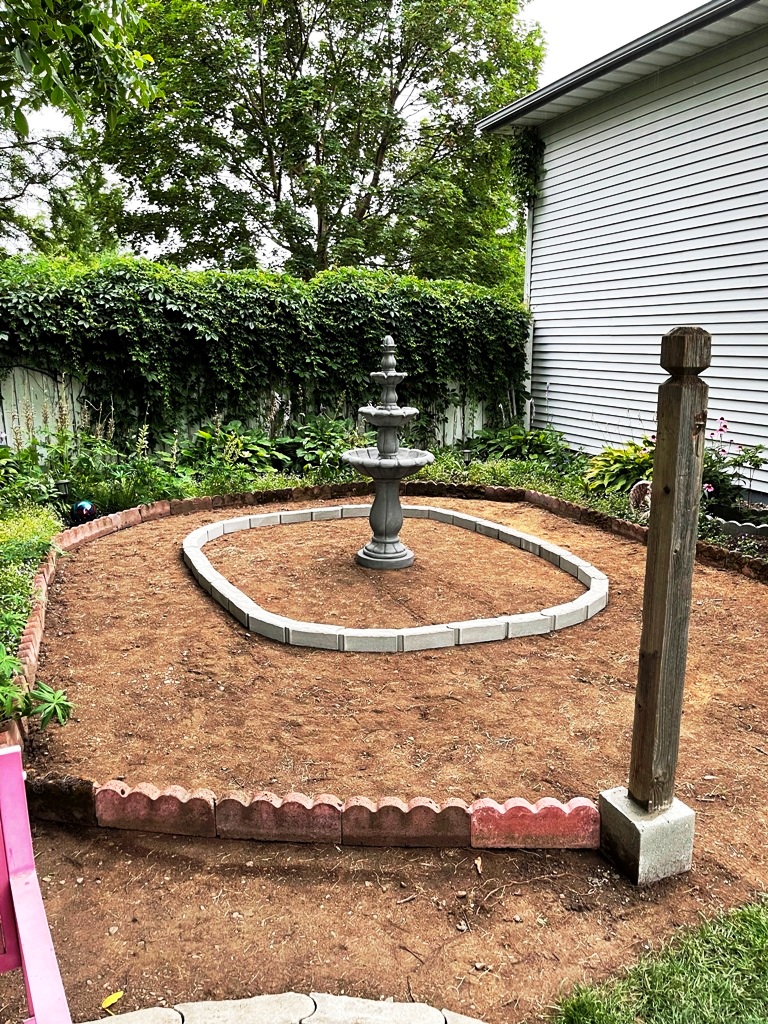
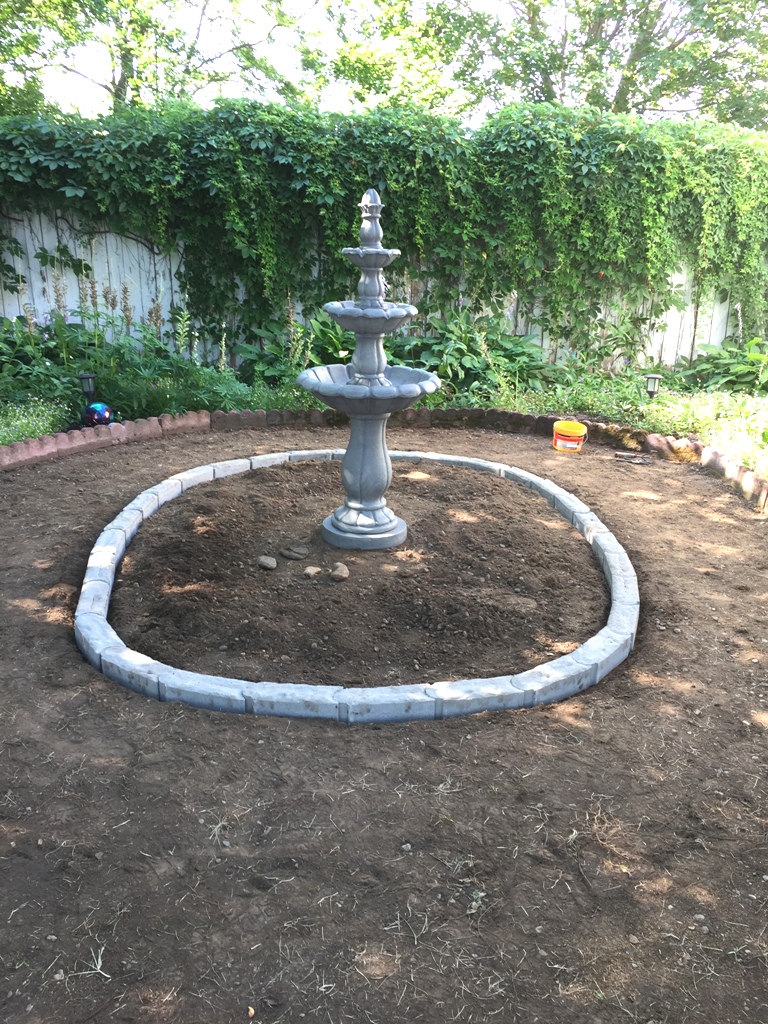
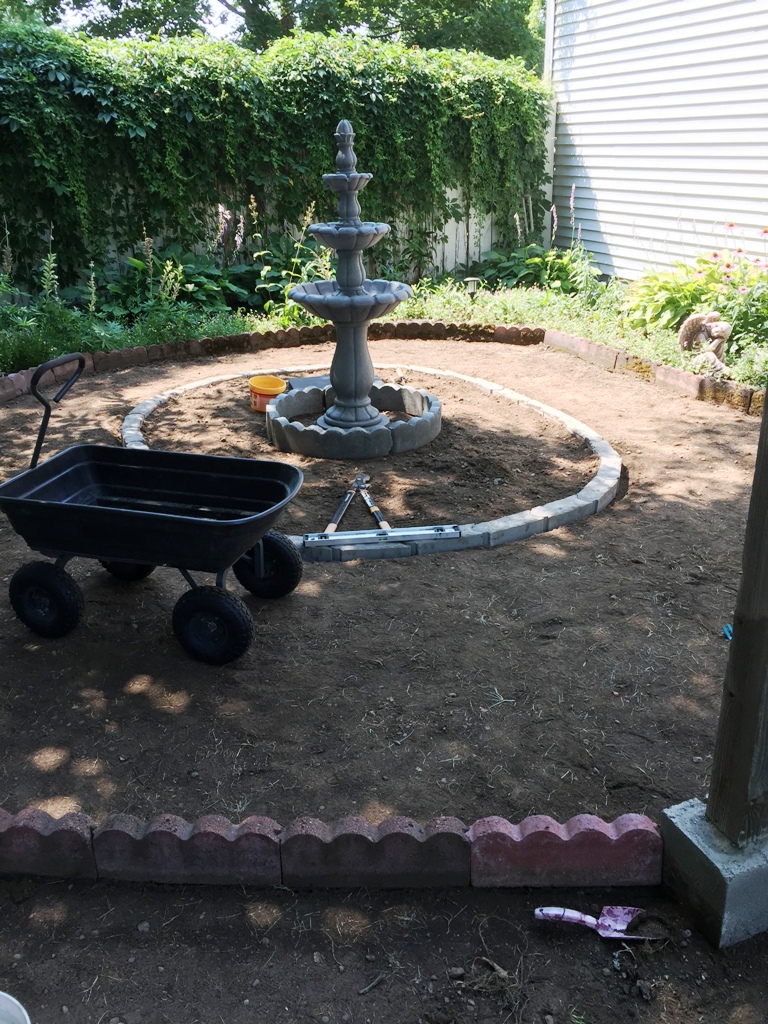
Adding brick
Now that I had an idea of the size of the garden, I made a trip to the hardware store and bought bullet bricks. I’ve used these edging bricks in the other areas of both the front and back yards. When I got home, I placed the bricks around the fountain. In the past, I have just set the bricks on the ground then filled the areas with either rock or bark. This time, though, I decided to dig a trench to set them in the ground as opposed to on the ground. Digging in our soil is not an easy task due to the huge amount of rock we have but I took it slow and managed to get it done! I also added a cement tree ring around the fountain and dug a trench for those pieces too. I then added fresh soil inside the ring and the bullet bricks to prepare for plants. Once the new garden area was done, I dug a trench for the old edging bricks around the existing garden.
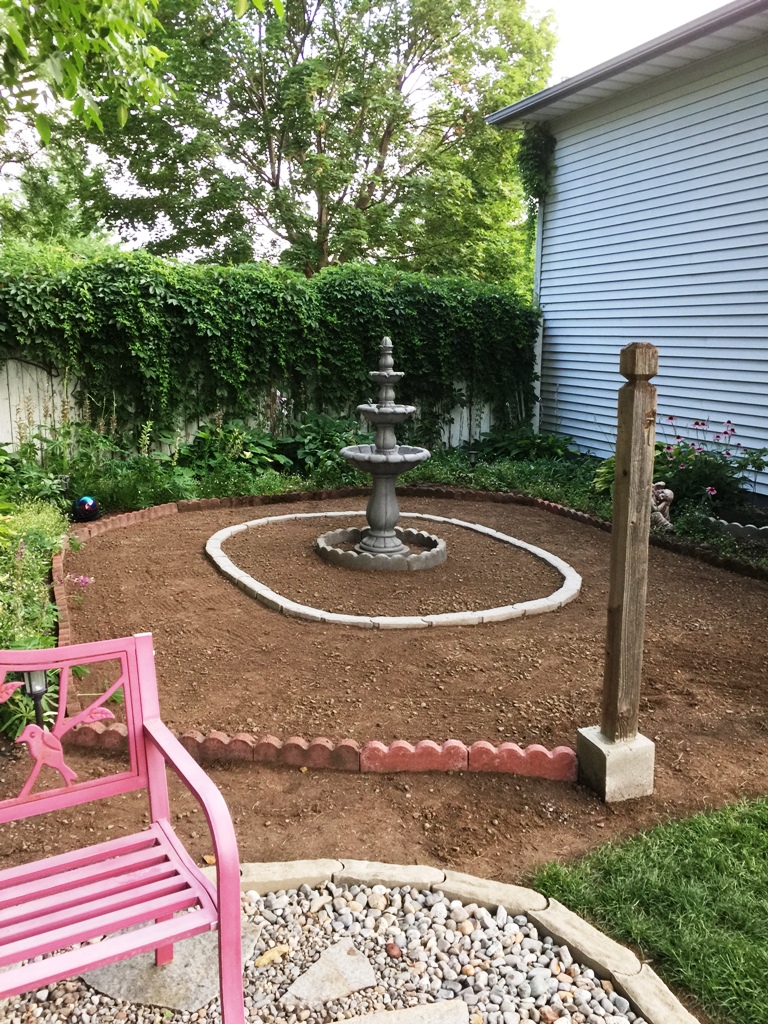
Prep work complete!
Whew! It took 3 days, approximately 20 hours, for me to remove the sod and a couple of days to arrange the bricks and dig the trenches. I like to view these summer projects as my at-home cross-fit training. It helps it feel less like work and more like a challenge 🙂
East Side Yard – Before East Side Yard – Prepped
Next Up
The next step will be to create a pathway between the existing and new gardens. My plan is to use a combination of flagstone and paver bricks. Stay tuned! I’m so excited!!!
Supplies Used
- Garden blade shovel
- Small garden rake
- Garden cutting tool – small
- Garden wagon
- Garden gloves
- 40 bullet bricks @ $1.50 = $63
- Newspaper
- Soil – 2 1 cubic feet bags @ $2.50 = $5
- Garden Bench – Lowes $84
- Fountain – At Home $276
- Solar pump – Amazon $35
Instructions
- Measure the size of the area where you are removing sod
- Mark with a string line or garden hose unless it’s a set area like mine was
- Using a garden blade shovel, cut through the soil in 1′ x 2′ sections
- Pull up the sod and set aside
- You can use the shovel to loosen the sod or a small garden rake
- Use edging bricks to line the new area, creating a trench to lower them into the gound
- Add soil for plants
- Set fountain in the center of the garden area
If you need supplies
This post contains Amazon affiliate links. If you choose to order through these links, it will be at no extra cost to you


Sign up for more project ideas!

Let’s Stay in Touch!
I’m excited to share more projects with you as well as tips/tricks/freebies! Just enter your email below to be one of my Blog Peeps!

You May Also Like

Let’s Repair the Deck, Part 2!
Let’s Install a Stock Tank Pool!
